openSenseMap - connect your senseBox to the internet
By using either the ethernet or WiFi shield of your senseBox (depends on the one you have ordered) you can connect your Arduino to your network. This allows uploading the measured sensor values to the openSenseMap (oSeM). You can get detailed information about the shields here.
Setup
Plug either the ethernet or WiFi shield into the top of the Arduino. If you use the ethernet shield, please connect the shield to your router by using an ethernet cable.
Information: The WiFi shield only supports WiFi network with simple WEP/WPA/WPA2 encryption. Networks that are using certificates are not supported!
openSenseMap registration
Before your senseBox can upload data to the openSenseMap, you have to register a new sensor station. Therefore visit the registration and follow the registration steps.
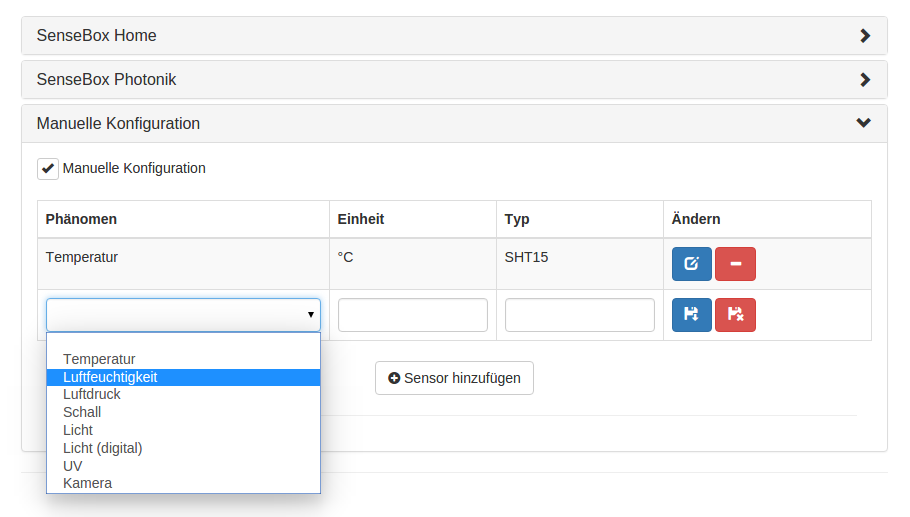
If all sensors will be connected, you can choose “senseBox:home” under the sensor setup step. If only some or additional sensors will be connected, please choose the “manual setup” and each sensor must be configured manually.
 .
.
After finishing the registration process, you will receive an email that contains an Arduino sketch with basic functionalities to connect your sensor station to the oSeM platform. If you have chosen “manual configuration” during registration, you have to add the code for reading the sensors to your sketch.
Extend the sketch
If you have a senseBox with a WiFi shield, you have to add your network name (ssid) and password (pass) to the sketch.
You can copy the code for reading the sensors from the previous sections.
Normally for each sensor you have to:
include a library
declare and initialize the sensor (setup() function)
read the sensor (loop() function)
Here is an example for reading the air pressure sensor (BMP280).
Example: BMP280
Add the BMP280.h library to the top of your sketch and create an instance bmp of it.
On this object every function of the BMP280 is called.
#include <BMP280.h>
BMP280 bmp;
Now the sensor must be initialized inside the setup() function.
if (!bmp.begin()) Serial.println("BMP init failed!");
bmp.setOversampling(4);
After, the sensor must be read inside the loop function. Therefore add the following lines of code to your sketch.
By using the existing function postFloatValue() the measurement is uploaded to the oSeM.
double temp, pressure;
char bmpStatus = bmp.startMeasurment();

// if an error occurred on the sensor: stop
if (bmpStatus == 0) {
  Serial.println(bmp.getError());
  return;
}

delay(bmpStatus); // wait for duration of the measurement
bmpStatus = bmp.getTemperatureAndPressure(temp, pressure);

postFloatValue((float)temp, 4, TEMPSENSOR_ID);
postFloatValue((float)pressure, 4, PRESSURESENSOR_ID);
Network connection
After you have connected your Arduino to the internet, you can upload the sketch to the Arduino by using the IDE. Inside the Serial Monitor, you can check if the internet connection is working. If the internet connection is working you will see measurements on the openSenseMap!
Connection problems
If the measurements of your station will not show up on the openSenseMap please check the following steps:
- Ethernet shield: Check if the orange LED is blinking. If not please check your cable connection. WiFi shield: Check your WiFi credentials again open the Serial Monitor and check the messages
Made with ♥ by the senseBox team at ifgi, WWU Münster
All content is published under CC BY-SA 4.0
